Monday, December 28, 2009

Another Card Purse Set

Hi there! I hope that everyone has had a wonderful start to the week. I spent the day at home cleaning and creating! One nice thing about this time of year after the bustle of Christmas is the time to spend at home relaxing and creating! It's too cold to go outside! And also after making Christmas cards all the other stuff feels new again! I also want to share this cute photo from Christmas of Carter. He starts to smile as soon as he sees the camera (although funnily not when we did the professional photos) I think it's so cute to see him a suit with a tie! He's so small and all dressed like a man! Looking at that smile you must wonder how I don't spend all day cuddling and kissing him, well I spend most of the day doing that!


Today I have another card purse and card set that I made, this time for my mother! I used the Everyday Button Bits by PTI for her set, and made them quickly! Here is the purse:

Here is the inside with the cards:

Here are the cards:


This is the first time I used the topiary!


My mother loved them! And of course they were fun to make!
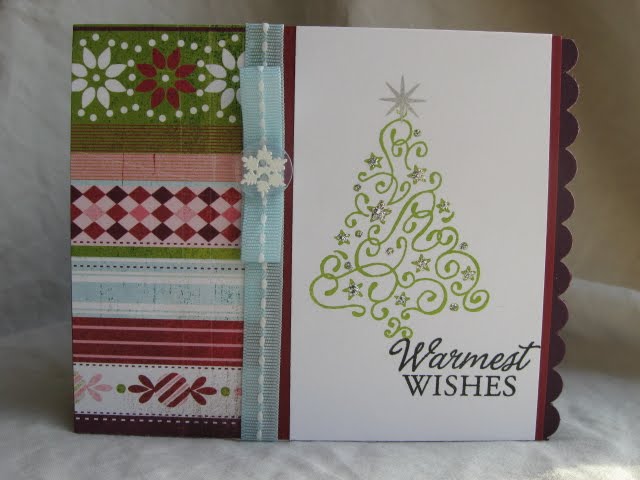
Products used: PTI everyday Button Bits, Nestabilities Labels 1, Buttons, Black& Chocolate Chip Ink SU, Bazill cardstock, PTI Buttons, Minds Eye PP, Michaels Ribbon, SU Felt snowflake.


Until next time!
Edited to add:
I am sorry thatI didn't share the link where I learnt the purse template here it is:
http://www.splitcoaststampers.com/forums/showthread.php?t=436236&highlight=mini+note+purse (no clue as to how to make this say here)

Sunday, December 27, 2009

A Card Purse!

I hope that everyone had a wonderful Christmas! I did! It snowed all through Christmas eve to boxing day! We didn't have much snow beforehand so it made it much more of a white Christmas! It was also quite exciting as every year in my hubby's family we have the children reenact the nativity, and this year my daughter was Mary! It's so awesome that we do this and that we have enough children to be able to! It really helps the children to remember that we are celebrating Jesus' birth. Here is my cutie:


The day after Christmas in Canada is also a holiday and called Boxing Day. It also happens to be the big shopping day, sort of like Black Friday. I of course had to work. With the big snowfall the mall wasn't as crazy as past years and I got a bit of shopping done before work. I spent my shift being the greeter telling everyone about the sale, it was fun! If I could find a job where I know all the info and than help people and tell them the info they need to know...


Tonight I have a card purse to share with you!


Isn't it the cutest thing? I love it! I saw it on the American Crafts blog last week and went to the splitcoast thread of how to make it. It's so much fun to make! I decided on Monday to add to my Christmas gifts for my mom, MIL and my hubby's grandmother to make them little matching card sets. Than I saw this and thought it would be the perfect way to give the cards! This purse and card set is the one I made for my MIL. Here are the cards:


Not the best photos since last week was more cloudy. Here is the inside of the purse:


I used all Hero Art stamps for the cards. I made them smaller using the largest of the Nestabilities Label 1 as the card shape. I also used my butterfly cling that I bought a while ago but was too deep into Christmas card making to use. And dressed the cards up with some rhinestones.


My MIL loved the cards and the purse too of course! Hope everyone is having a wonderful holiday season!
Tommorow I will update the products used....


Thursday, December 24, 2009

Merry Christmas!

Merry Christmas! Hope you are having a wonderful holiday! I wanted to do a quick post to wish you a Merry Christmas and to share my digital holiday card I sent out. I also sent a handmade christmas card too! I am so pleased with my family pics!


Aren't I blessed with such cute children? I love how much alike they look! And everyone always says she is a little me and that my son is a little Chad! I love my family! Hope your all having a special Christmas spending time with the ones you love!

Monday, December 21, 2009

Day 11 Wrapping it Up with Tags

Today for Day 11 I have two tags to share! I am sure that most of you are like me and are deep into the wrapping! I always forget how much work wrapping is! Especially since I wrap later in the evening after the children go to bed so that they don't see there presents and so that my baby doesn't come along and open the gift! Last month when wrapping a birthday gift at well the last moment I was all done and he put his hand through it! Urghhh! Here are the two tags I have made so far:


For these tags I was inspired by the presents. What I did was go shopping for wrapping paper with my stamp sets in mind! Than I used the colors of the wrapping paper. Here are the three papers I got with the tags that I made for them:


I still have to make a tag for the back one. I may use a tree or the snowman by PTI. I think the Santa works well with the Santa paper and love the Hero Arts Striped Circle as the base for the ginger man tag. I haven't finished wrapping the gifts, I realized that I need some ribbon!
Today my daughter and I also made some Chunky Toblerone Shortbread! Hmmm yummy! I also finished my shopping! I am quite excited for my daughter as we got her some gifts that she has been asking for! Of course my baby will be happy with his gifts too!


Products used: PTI Christmas Button Bits, Moss Green Colorbox Ink, SU Chocolate Chip &Black ink, PTI Buttons, HA Striped Circle Cling, DCWV PP, Nestabilities Lables 1.

Sunday, December 20, 2009

Day 10 The $10 gift exchange game

Hope everyone is having a wonderful holiday season! Enjoying this time before Christmas! Today for Day 10 of my 12 days of Christmas I have a card set with a matching purse! I had a family gathering on my husband's side today and we play the $10 gift exchange game. You know the kind where you take turns by numbers or cards picking a gift and opening it or stealing someone else's! My mother in law had suggested that I make one of these card purses with matching cards for it! I thought why not? I didn't want to use a Christmassy one as it's so close to Christmas. Here is the purse, it's empty as I was waiting for the glue on the ribbon to dry!

I made 4 matching cards for inside. I used the PTI set Everyday Button Bits as I really like this set, I am on a bit of a button craze and I don't feel that I have really used this set as much as I love it! I made these cards more simple and quickly! Here is the first card I tried to make it masculine if need be:


It may be hard to tell but the brown panel is a wide ribbon! I also embossed it with my small dots plate in my big shot.

This is only the second time I have used the balloon stamp!


For this card I had to try doing the panel on the side with the big scallop punch as I have seen it done a lot by other people. I totally have to be honest and did not come up with this wonderful idea on my own, I was very much inspired by Malle Belles.

And this last one was the last one made right before bed! I really hoped that the person who got this gift would really like it. I put it in one of my PTI gift bags that I made from Day 4, I also threw in one of my listpads (I have a few why not?) Chad's cousin picked it and loved it! She really loved the bag too! So there you have it, why not make a card set or something else handmade for the next gift exchange game? It doesn't have to be matching or anything. People will love it! And you will enjoy making it!
Products used: PTI Everyday Button Bits, Bazill cardstock, ribbon, thread, PTI Buttons, Colorbox MossGreen pigment ink, SU Chocolate Chip,Black ink, Bo Bunny PP, SU scalloped punch, Labels 1 Nestabilities.

Saturday, December 19, 2009

Day 9 A Little Gift Set

Welcome to finally Day 9! I am sorry for the break. On Thursday my daughter and I were struck with the stomach flu! No fun! Needless to say I wasn't able to blog! Today I have a card box and set to share. Here is the box:


I made it again with the splitcoast tutorial on an A2 box but made it smaller an inch around and scored it only at an inch (rather than the 1 1/2) I wanted it to be not as deep. Here is the box open with the cards and tags:

Here are the three matching cards and tags:


It's a more simple set. I used the SU set Tree Trimmings along with a sentiment from a Hero Arts Christmas sentiment set (What a fabulous set it is I used it almost for every card!) I used my nesties Lables 8 and than stamped the ornaments with moss green, cranberry red colorbox pgiment ink, and the brown is Chocolate chip by SU. I put some rhinestones on each card also. The tags are also the same but smaller size Labels 8 also. I gave this set to my daughter's music teacher and she loved it!

On Thursday we went to see Santa. At one of the local malls a visit with Santa and a photo were free! When we arrived there was a children's choir singing Christmas carols and no line for Santa! I was anticipating quite the line! The photo went well. I am pleased that both children are smiling! My daughter complained of a sore tummy while shopping but thankfully didn't get sick until we were outside in the parking lot. I felt funny also and got sick later that evening. My daughter and I spent the evening in my bed together sick! She felt fine yesterday but I still didn't feel all that well but am happy that I feel really good today! Here is the photo of them with Santa:


As you can see my son is sitting all funny, he was arching his back trying to get away! I am just pleased that there both smiling! Especially him he is so little! And yes I dressed them up in there Christmas outfits, and he is wearing a little black velvet suit with a tie!

Wednesday, December 16, 2009

Day 8 Another Button Purse

Today for Day 8 I have another card purse to share! I really do enjoy making these! I used the PTI set Holiday Button Bits again. It's so easy to create with this set! I made a few things but could keep going, but I don't really need any more. Let's see if that stops me!


I really like how you can see the top of the card through the ribbon!

A close up of the card inside.

Yesterday I took my daughter to see the new movie The Princess and the Frog, it was really good! My daughter loved it and behaved so well! It was fun to see it with a girlfriend and her three girls too!
I have to leave with a short post as I work soon! See you tomorrow!

Tuesday, December 15, 2009

Day 7 Snowflakes being bagged everywhere

10 days until Christmas! I cannot believe that Christmas is so soon! I have finally got quite a bit of shopping done so I am quite happy! I have all my greeting cards pictures printed so I look forward to mailing and handing them out! Now to actually finish writing them!

Today I have a gift bag and matching tag to share:


I took the photo on the tree. My tree finally went up, a bit late! We had been putting it off with having a nearly 16 month old baby boy in the house! I am sure he will be enjoying it! The tree is still without decorations otherwise my bag would not have matched! I stamped the Kraft bag with white pigment ink with the HA snowflake heating it with my heat gun after but I still let it sit for a few hours before doing the other side. I made a cute matching tag also. The PP is from a DCWV Christmas set from a few years ago, the colors are more traditional. The big snowflake is a felt one by SU I attached it with the liquid glass, I am loving this stuff more and more as a glue! I find that felt pieces can be hard to attach since sometimes they bleed through. The liquid glass can do that but not if you don't use too much. I than added the red rhinestone to the middle. I also inked the edges with the white stamp pad! I so enjoy making bags!
Products used: Michaels kraft bags, DCWV PP, Bazill card stock, colorbox white pigment ink, HA Grand Snowflake and sentiment Cl343, SU felt snowflake,SU scalloped punch.
I am quite excited as I am taking my daughter to see The Princess and the Frog tonight! And a girlfriend will be bringing her 3 girls also! My daughter is quite excited!

Monday, December 14, 2009

Day 6 Listing it Up

Oh the weather outside is frightful.... Frightful it is! It has been so very cold here. Yesterday was a horrible -38 C with windchill. Today is a -29 with windchill. I went to weather.com and checked to see what it would be in Fahrenheit and it's -2F and they say it feels like -20F (basically with windchill) I bet a lot of you cannot image how cold that is! And I wonder how cold it was in F yesterday!

Well today is Day 6 of my 12 Days of Christmas on my blog. I missed yesterday. It was a combination of everything, working, family gatherings and going to a later service at church. But I am back today with these List pad books I have made! I saw these all over online but these are based on the tutorial on splitcoast. They use the newer set by PTI Take Note that I actually borrowed from a friend! I have made a lot of these but these are what I have left. I am not the biggest list writer but A LOT of people are. Especially a lot of people that I know! I like how they are long and thin, I usually only use that much of a paper when writing a list. I got the pads at Staples, they were 5 by 8 and I had them cut them in half to be 2.5 by 8. I tried to cut them myself with a guillotine but it cannot be done so just have them cut it! They do charge for the cutting though. They have this huge machine that cut all 11 of the pads at once! (there were 12 pads but I ruined one when I attempted to cut them!) Here they are,I kept the black and pink one from the first picture for myself.


The inside on some of them I made a little pocket with the PP. I cut the half circle with my punch.


And of course a Christmassy one. I made a few different styles but this is all I have left.


I really should have taken photos of them before giving them away! My favorite ones are gone! I used PP mostly from Bo Bunny. I used a 5 1/2 by 8 1/4 piece of card stock for the base. I like that you can make two booklets from one piece of 81/2 by 11 card stock! I scored it on the short at 2 5/8 and 2 7/8 . I really enjoyed making these! I do have 6 more books so make more! I especially love this stamp set by PTI!

Friday, December 11, 2009

Day 5 A Purse full of Buttons

Saturday is here! Do you consider it the best day of the week? For me I do love Saturdays but I often find it to be so busy! Today I am working a full day at the mall should be quite busy! But it does make the day pass by that much faster!


Today for Day 5 I have a purse and card set to share. I think it was last week that this was a tutorial on splitcoast. I happened to be on there and just noticed it and fell in love! It was super easy to make and I think it's just darling! I've shared it with a bunch of friends and they loved it too! I used the PTI Holiday Button Bits stamp set again. Here is the purse with the cards in it the way I would give it to someone (I think):


Here is the purse and the three matching cards. Do you notice that they are in clear envelopes? I love to give my cards in clear envelopes! These ones are by Stampin Up but I have bought other kinds before, and even the dollar store has some but not an A2 size currently.


And here is the card that I have inside. I made 3 of the same cards for this. Looking at the picture I realize that I didn't take it straight so the bottom panel looks a little crooked!


Products used (not mentioned yet) upper Crest Border punch by fiskars, SU Black ink, buttons by PTI, cardstock by Bazill, ribbon fromWalmart, labels 1 nestabilities.


I can't wait to give this away! I love it! I also think I may have a love of ornaments stamps!

Day 4 Bagging It Up

Hi there and Happy Friday! Today makes 2 weeks until Christmas! I can't believe how fast December is flying by and that Christmas is coming quite soon! I am not done my Christmas shopping yet, how about you? I am not stressing about it either, I like the whole shopping during December and also there are better sales in December!

Today I have two bags to share with you! I love the whole idea of making my own gift bags! It's so much fun when giving a gift! Both bags are the same design but different stamps and papers. Both use the Christmas set Holiday Button Bits by PTI! I couldn't wait to receive this set, seeing as it sat at the Canadian border from almost 2 weeks! Do they not know that there were stamps in there and there was a crafty girl just waiting for them? My friend ordered them for me with her order and placed another order with PTI almost a month later and received her second order the day after her first order! Oh well at least I have you my wonderful buttony set! I also got the Holiday Vintage Buttons too! Here are the bags:


So simple but yet so pretty! I used some PP that I liked and cut them at 10 inches by 3 inches. Than I cut some nesties labels 1 out of cardstock and stamped my images from the Holiday Button Bits set with pigment inks. Heat set them and attached some buttons with liquid glass (also called glossy accents or crystal effects.) I really like using the liquid glass for glue for my buttons. I used to use double sided tape but didn't feel that it would be durable enough, and I didn't like how glue dots aren't flat and the button sticks up! I love how strong and clear the liquid glass is! How do you attach your buttons to your projects? I finished the bags off by tying a bow with some ribbon on the handle. On the first bag I attached a button to the bow too! I can't wait to wrap up some gifts in these bags!

Until tomorrow hope you have a great start to the weekend!

Thursday, December 10, 2009

Day 3 Krafty Ornaments

Today for Day 3 I have a Christmas card to share! I made about 10 of these! I love this stamp set by Stampin Up and the coordinating punch that goes with it! Super easy ornaments! Here is the card:


I based the colors for my ornaments on the patterned paper by Bo Bunny. I used this paper also for another card, I just love it! The Merry Christmas is from the PTI set Holiday Button Bits. I used colorbox and PTI pigment ink for the stamped ornaments. I really like to use pigment when I stamp solid images, just heat it with your heat gun for a bit to speed up the drying process. I looped some silver cord and taped it on the back of the ornament, I thought of doing the hanging with bows again but thought to be different, and well it was way easier especailly since my darling hubby did this! I also used an EK Success punch for the bottom border but realize that looking at the punch I have no idea the name of it! Sorry! But in all honesty me and this punch have a not so great relationship. Although adore it I do!

Of course I have much more to say but I have been "wasting" a lot of time online ordering family photo cards and our family pics. About 2 weeks ago we had some natural light photos taken and they turned out just amazing! I hope to write out my cards and hand/send them out this weekend. I am doing both a handmade Christmas card and a photo digital card. I thought of combining both but I just got the photo's back this week. I want to keep the photos as a surprise until my friends and family have them in hand so for now I will just share the one of me and hubby:


Until tomorrow with Day 4, maybe some buttons?

Wednesday, December 9, 2009

Day 2 Snowmen all in a row

Hi there! For today day 2 I have to share a matching gift box, card and tag set. I haven't decided who will receive this, I know I will decide when I am about to give it. I am making these sorts of things for my daughter's preschool teachers, music teacher, ballet and so on. Although my MIL told me that I also should bring card sets and such for the family events where you play the gift exchange game (you know the kind bring a $10 gift) for some reason I hadn't thought of it! Good idea! It's a simple design. Here it is all"wrapped"up:

I made the box from the splitcoasters tutorial on an A2 box, although the box was too deep for me so I changed the measurements by an inch smaller in both the depth and width and than scored at 1 inch on the sides as opposed to the 1 1/2. The box was rather simple to make a lot easier than I thought it would be. What I did to practice was making it with random cardstock, a color I didn't care for to learn what I was doing. I made a simple tag for the top where I will write the name of the recipient. Here is it opened:
And here is the card and tag. I made 3 cards and 3 tags to go into the box. I stamped the snowmen and than colored them with colored pencils. I also put glitter on the bottom of them. It's a very simple design but I really like it!

Products used: Kraft cardstock Bazill, corner rounder, snowman stamp set CTMH, HA greeting, Michael's ribbon and stickles!
Thank you for all your comments on yesterday's post! Especailly the birthday ones! I love reading comments, it really does make a day better! :> I better run. My children are napping and I would like to lay down for a bit! I took them to stay and play at my church this morning, it was fun for them and me (chatting with other mom's) but it is also tiring dressing them in there warm coats, boots so on. Especailly my little guy! It's such an arguement trying to get his gloves on and then forcing the gloved hands though the jacket (the only way he can't get it off!) It's quite cold here so these are things we must do! I work this evening and for the next few nights, I just enjoyed a week off. The mall is quite busy and I work as a cashier in a popular children's clothing store! But thankfully my hubby made some spaghetti sauce late last night so that makes it easier!

Tuesday, December 8, 2009

12 days of Christmas...

I thought it would be fun to do a 12 days of Christmas on my blog. I haven't been the best blogger since I have been hard at work with my Christmas card and project making. I want to share my ideas and what I have made so I figure I have a lot made why not? I hope you will enjoy it!


Today on Day 1 I am sharing an easy gift card holder card (thought it would be fun to take the picture in my front window so you can see how little snow we have!)


The measurements for the card are: 4 1/4 by 10 3/4 inches. Basically just a bit shorter than an average A2 card. I used double sided patterned paper that measured 4 by 4 and 1 3/4 by 4. My snowflake is a square it doesn't matter the size. But I did mat it on two pieces of cardstock to make it heavier and stronger.

Score the card at 4 1/4 by 8 3/4 (on the long side) fold. Using the window punch by SU punch twice on 4 by 4 square (do this before attaching the PP) as deep as you can (as far as the punch will go) If you don't have a window punch another way of doing this is using a small circle punch, punch the circles twice (closer to the corners of the card) and than attach them using a ruler and hobby blade or if your daring your paper cutter. (When you attach the circles attach it so that it makes a long rectangle with curved sides) When attaching your patterned paper (PP) to the card only put adhesive on the four edges and along the edges. That way there is room for your gift card to go in.


The card stays shut by tucking the snowflake PP side under the main snowflake square. Attach pop up dots to only the bottom of the snowflake square. In the next picture you can see how I am tucking it...

And there you have it! I really like this card since the gift card has it's place and with how the card stays shut you don't have to worry about the person receiving it losing the gift card. It would also work well with folded money. And even gift receipts . I lost a gift receipts at my daughter's birthday in the shuffle of the party and never did notice it on the floor and someone just cleaned all the tissue and wrap and didn't notice it and threw it away! So I am very pro for even putting gift receipts in there!
Products used: Bazzill cardstock, BoBunny PP, SU window punch, HA GrandSnowflake (stamped and embossed with irdesent powder) HA sentiment.

Today is the day after my 30th Birthday. A big birthday! I am just like my mother in that I hate to reveal my age. And it worked for her since everyone would tease my father that he married a younger woman, while all along she was a month older than him! I shouldn't feel this way since I am living a life that I am happy with. I am fullfilled in my Lord, I have a wonderful hubby and two amazing healthy children! I am really blessed! I had a fantastic birthday, a week a bit ago I celebrated with about 15 of my girlfriends, not all were able to make it but a lot did! We had dinner at a local restaurant and than saw a movie. It was a lot of fun to have some girl time. I am truly blessed by my friends in many ways and I am thankful for everyone of them. Here is a photo of us as were leaving the restaurant, it is a bit dark though.


Yesterday on my actual birthday I went to the mall with two friends and ther two children. It was nice to spend time with them, although we did have quite the scare when we had a hard time finding one of the children. Praise God we found her quickly, although it was scary! In the evening my hubby and I went to see New Moon. He had the idea to save the movie for my birthday which was a great idea! The movie was great and made my birthday even more fun to look forward to!

Well until tommorow!

Tuesday, November 24, 2009

Snowflake embossed button

Happy Tuesday! I can't believe that November is almost over and Christmas is just over a month away! This fall is speeding by! I have yet to start my Christmas shopping! I am not worried, I love to shop, and I am a great speedy shopper! I also like to shop in December, that way it feels as if I am Christmas shopping!

I may not have started my Christmas shopping but I have been busy creating all sorts of Christmas goodies! Today I have one card to share. I have been having all sorts of comments on my use of patterned paper and such. I love patterned paper! I often take my inspiration for colors from the paper! I am always on the hunt for great paper! Sometimes I buy stacks but lately I have been buying more single paper. One of the difficulties on using PP with stamping is matching the images and such. I tend to favor PP in smaller prints, stripes (oh how I love stripes) and dot patterns! I also like to create my own PP with stamping and such but I feel that I need more stamps to do that! (but really do we ever feel as if we have enough?) I also try not to hoard my PP it goes out of style or I fall out of love with it so I like ot try to use it as soon as I can. And I often make more than one card from a single piece of paper. Sometimes I focus on one or two PP's and color scheme and make several different cards with that one. It's quite time saving! Anyways onto today's card! I used PP from Basic Grey's Eskimo kisses line getting my color inspiration from that. I stamped the tree from a HA set but my favorite part of this card is the button! It's a clear HA button that I embossed a HA snowflake onto! I saw this technique done by Kristina Werner I think for HA a while ago. I always remembered it and when I finally got some clear buttons I was able to do it!


A close up of the button. I used tweezers to hold the whole button when I stamped the button onto the stamp. In KW's video she shows holding the button with the holes but my tweezers wouldn't do that! It took a few button tries to figure it out and get it well but you can scrape off with your finger the embossing and try again.


Products used: Bazill cardstock, Michael's ribbon, stickles, colorbox moss green and silver pigment ink, Basic Grey Eskimo Kisses PP, Ha stamps: tree CL113, words and snowflake: CL343,star: CL354, SU scalloped border punch.

I also wanted to share one of my daughter's first drawings. Her name is Ariel, and it's quite fitting that her first drawing is of a mermaid of course! She has always been into coloring and crafting but just last week started to draw people, I am quite impressed she just turned 4! Also it's a little funny! I had a good laugh and had to share it! Can you see why I find it so funny?

I also wanted to wish all my American friends a Happy Thanksgiving! May you enjoy this special time with the ones you love! And may you have a really really good dinner topped with the perfect pumpkin pie (my favorite!)
 

Crafty Girl Designs | Creative Commons Attribution- Noncommercial License | Dandy Dandilion Designed by Simply Fabulous Blogger Templates